Perfecting Dirty Pour Resin Art
- May 2, 2025
- 7 min read
Updated: May 7, 2025
Essential Techniques for Perfecting the Resin Art Dirty Pour
If you've ever been captivated by the swirling colours and glossy finishes that seem to dance on canvas, you're in for a treat! In this blog post, we’re going to master one of the most exciting techniques: the Dirty Pour. This method not only adds depth and dimension to your creations but also allows for spontaneous bursts of creativity that can lead to stunning masterpieces.
Whether you’re a seasoned pro or a curious beginner, join us as we explore essential techniques, tips, and tricks that will elevate your resin art game from ordinary to extraordinary. Grab your gloves, mix those vibrant pigments, and let’s get pouring!
What Is Dirty Pour Resin Art?
This unique technique allows artists to create stunning, abstract masterpieces with a beautiful blend of colours and textures. No matter if you're a seasoned artist or just starting your creative journey, mastering the dirty pour method can open up a universe of artistic possibilities. Picture this: vibrant swirls of colour seamlessly merging together in an eye-catching display that grabs attention and sparks conversation.
The beauty lies not just in the final piece but also in the process itself—it's spontaneous, freeing, and oh-so-satisfying. With a few essential materials and some key techniques under your belt, you'll be well on your way to crafting breathtaking works that showcase your individual style. So grab your supplies and get ready for an adventure filled with creativity as we explore everything you need to know about dirty pour resin art!
Materials needed for a successful dirty pour
Creating a stunning dirty pour resin art piece requires more than just pouring random colours onto a canvas. It requires careful selection and preparation of materials in order to achieve the desired results. In this section, we will discuss the essential materials needed for a successful dirty pour.
1. Resin: The most important material for any resin art is, of course, the resin itself. When choosing a resin for your dirty pour project, it is crucial to choose one that has a slow curing time. This will give you enough time to manipulate and move the colours before they set. Additionally, make sure to use high-quality resin to ensure that your final piece has a flawless finish.
2. Pigments or colourants: The pigments or colourants are what add vibrant hues to your artwork. You can use acrylic paints or specially formulated resin pigments for your dirty pour project. It is important to choose colours that complement each other and create an aesthetically pleasing colour scheme.
3. Canvas or Surface: A smooth and level surface is necessary for creating a clean and even dirty pour design. You can use various surfaces such as canvas, wood panels, ceramic tiles, etc., but make sure they are prepped with gesso or sealant beforehand.
4. Mixing Cups and Stir Sticks: When working with resin, it is crucial to measure out equal amounts of both parts (resin and hardener) accurately in order to achieve proper curing results. Use separate measuring cups for each part and mix them thoroughly using stir sticks before adding any pigments.
5. Heat Gun or Torch: These tools are essential for removing air bubbles from the poured resin and creating unique effects on the surface of your artwork.
6. Disposable Gloves: Working with resin can get messy, so it is best to protect your hands by wearing disposable gloves throughout the process.
7.Mixing Container/ Silicon Mat/ Craft Sheet – A mixing container allows you to pour your resin and pigments into it before pouring onto the canvas, making the process more controlled. A silicon mat or craft sheet is useful for catching any spills and drips, making clean up much easier.
8. Sealant: Once your artwork is complete and has cured properly, it is essential to seal it with a UV-resistant clear coat to protect it from yellowing or fading over time. Always make sure to read the instructions of each material carefully before starting your dirty pour project.
By using high-quality materials and following these tips, you can create stunning resin art pieces that are sure to impress.
Step-by-step guide to creating a dirty pour piece
Creating a dirty pour resin art piece may seem intimidating, but fear not! With the right techniques and materials at your disposal, you’re about to embark on a fun and rewarding artistic journey. Let’s dive into this step-by-step guide for crafting your own stunning artwork using the captivating art resin dirty pour technique.
Step 1: Prepare Your Materials – Gather all necessary items such as gloves, mixing cups, stirring sticks, your choice of vibrant pigments, and of course, high-quality resin ideal for creating dramatic effects.
Step 2: Mix Your Resin – Carefully measure equal parts of resin and hardener in separate cups before combining them in a larger container; stir slowly yet thoroughly to avoid introducing too many air bubbles that could mar the beauty of your dirty pour resin masterpiece.
Step 3: Add Colour – Here comes the magic! Introduce various colours to different sections of your mixed resin; consider layering them within one cup for that signature ‘dirty’ effect which will lead to mesmerising swirls once poured onto your surface.
Step 4: Prepare Your Art Surface – Choose an appropriate canvas or mould—ensuring it is level—is essential so that when gravity takes over during pouring, every colour flows beautifully together without unwanted pooling or drips going awry.
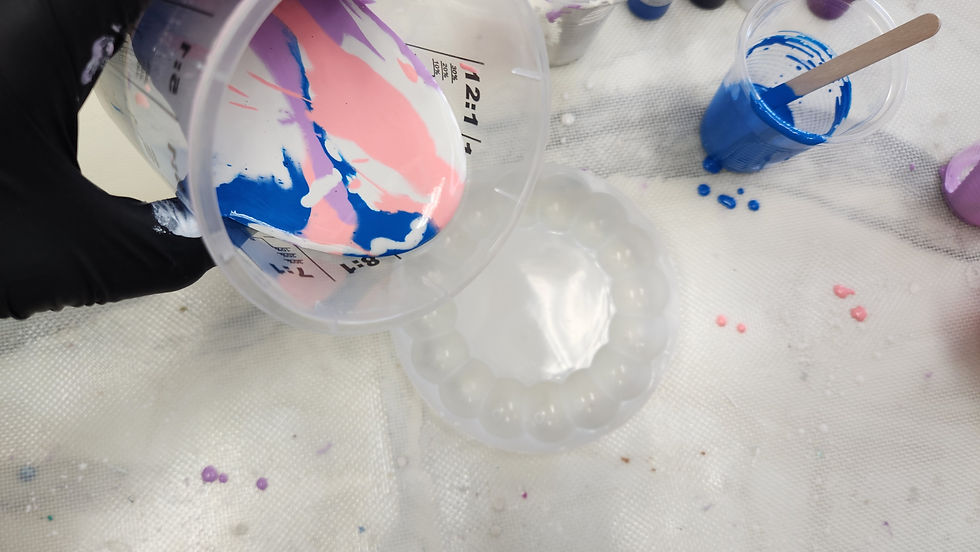
Step 5: Begin Pouring – Now it’s time to unleash creativity! Pour each layer directly from its cup into one spot on the canvas; watch as they meld together organically—a true hallmark of any successful dirty plastic pour project.
Step 6: Tilt and Swipe – This step is where you can really make your piece unique. Using a small tool like a toothpick or popsicle stick, gently tilt and swipe the colours across the surface to create beautiful patterns and designs.
Step 7: Remove Air Bubbles – Once you are satisfied with your design, use a heat gun or blow dryer on low setting to carefully remove any air bubbles that may have formed.
Step 8: Let It Dry – Resist the temptation to touch and move your piece around until it is completely dry. This can take anywhere from 24-48 hours depending on the thickness of your resin layer. And voila! You now have a stunning mixed resin art piece to display and admire for years to come.
With these simple steps, you can create one-of-a-kind pieces that showcase your personal style and creativity. The possibilities are endless when it comes to colour combinations, techniques, and surfaces used in dirty plastic pours. Experiment with different colour ratios, try adding glitter or metallic pigments for some extra sparkle, or even incorporate other elements like dried flowers or gold leaf into your designs.
Not only is this technique fun and therapeutic, but it also results in unique artwork that makes great gifts for friends and family or beautiful additions to your own home decor. So next time you're looking for a new creative outlet, give dirty plastic pours a try - who knows what kind of masterpiece you'll create!
Tips and tricks for creating unique and stunning designs
Experiment with colour combinations for your dirty pour resin art. Using contrasting shades can create striking visual effects, while complementary colours offer a more harmonious look.
Consider adding metallic or glitter pigments to elevate your design. These elements catch the light beautifully and add depth to your artwork.
Layering is another effective technique. Pour one colour at a time, allowing some to seep into others for interesting swirls and patterns.
Don’t be afraid of using different pouring methods—try flipping cups, tilting surfaces, or even layering in individual cups before combining them all together.
Each method yields unique results. Incorporate tools like straws or torches for added texture and effects after pouring.
A gentle blow can help move colours around without over-mixing. Lastly, embrace imperfections; they often lead to unexpected beauty in your final piece. Celebrate those little surprises that make each work truly one-of-a-kind.
Troubleshooting common problems with dirty pours
Dirty pour resin art can be a delightful experience, but it’s not without its challenges. One common issue is bubbles forming in your resin mix. To avoid this, make sure to mix slowly and at a low speed. You can also use a heat gun or torch to gently pop any surface bubbles after pouring.
Another problem artists face is colours muddying together instead of staying distinct. This often happens when the layers aren’t thick enough or if the colours are mixed too vigorously. Try adding more colour layers and keep your mixing gentle for clearer separation.
Sometimes, you might find that your piece isn’t curing properly. Ensure you’re using quality art resin specifically designed for dirty pours, as not all resins work equally well with this technique.
If you're experiencing issues with uneven surfaces, consider leveling your workspace before starting to ensure an even flow of resin across the canvas.
Inspiration and ideas for incorporating dirty pour into other art forms
Dirty pour resin art isn't just limited to canvases. Its fluid beauty can enhance various mediums. Consider furniture design.
A stunning tabletop coated with vibrant, swirling colours can become an eye-catching centerpiece in any room. Ceramics also welcome this technique. Pouring resin over pottery creates a glossy finish that highlights the intricate patterns underneath. For those into mixed media, combine dirty pours with photography or textiles.
Resin-coated fabric offers unique textures and colour depth for wearable art or home décor. Even jewelry makers find inspiration here. Small-scale pours on pendants or earrings can create one-of-a-kind pieces that captivate attention. Don't shy away from large installations either.
Walls adorned with expansive dirty pour designs can transform spaces into immersive experiences full of colour and movement. Experimentation is key; let your creativity flow like the resin itself!
The endless possibilities of the dirty pour technique
The dirty pour technique opens a world of creativity and experimentation for artists, both beginners and seasoned pros. With its vibrant colours and organic patterns, art resin dirty pour captivates the imagination and invites endless exploration. From mastering the basic steps to incorporating advanced techniques, there's always something new to discover.
You can adapt this method into various art forms like coasters, wall art, or even functional pieces such as furniture. The beauty of dirty pour resin lies in its unpredictability; no two pieces are ever exactly alike. If you approach it with intention or let spontaneity guide your hand, each artwork tells a unique story.
As you continue your journey in dirty resin pour creations, remember that every attempt brings valuable lessons and opportunities for growth. So gather your materials and dive into this captivating technique—your next masterpiece is waiting just around the corner!


